MicroPython Driver for DS1307
Contents
Introduction
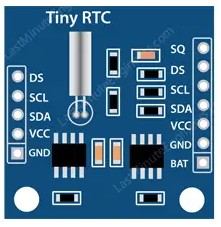
This a MicroPython driver for the DS1307 real time clock breakout board written specifically for the BBC micro:bit.
The DS1307 is discussed in some detail here. This reference also contains link details to the original driver file.

The driver can be:
- Copied from this webpage onto the clipboard then paste into the MicroPython editor e.g. the Mu Editor. It should be saved as fc_ds1307.py - OR -
- Download as a zip file using the link. Unzip the file and save it as fc_ds1307.py into the default directory where the MicroPython editor e.g. Mu Editor saves python code files.
After saving the fc_ds1307.py file to the computer it should be copied to the small filesystem on the micro:bit. The examples on this page will not work if this step is omitted. Any MicroPython editor that recognises the micro:bit will have an option to do this.
The Mu Editor is recommended for its simplicity. It provides a Files button on the toolbar for just this purpose.
Connecting the DS1307 module
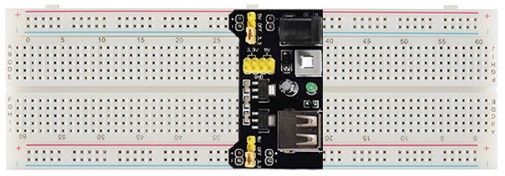
Power SupplyUnfortunately for micro:bit users the DS1307 requires a 5V power source which the micro:bit is unable to supply. So a separate 5V power supply will be needed for this project. This page discusses power supply options for breadboard projects.
A good option is the MB102 power supply module which will plug directly into a breadboard. It can supply 3.3V and/or 5V to the breadboard power rails.

I2C
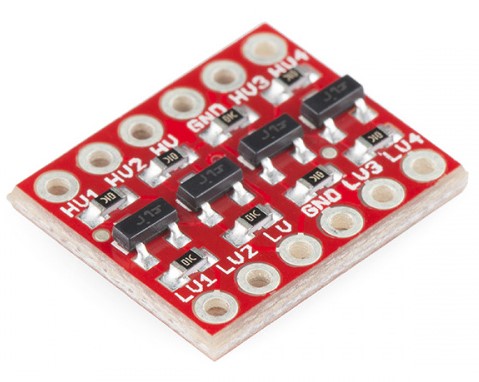
The DS1307 communicates via I2C. A voltage level converter of some sort will need to be used between the respective device's I2C pins because of the different voltages being used; 3.3V micro:bit and 5V DS1307.
This page discusses 'level converter' options for breadboard projects.
A good option is the BSS138 MOSFET Breakout Board. These little boards, known as logic level shifters are 'cheap as chips', reliable, fast and easy to use.

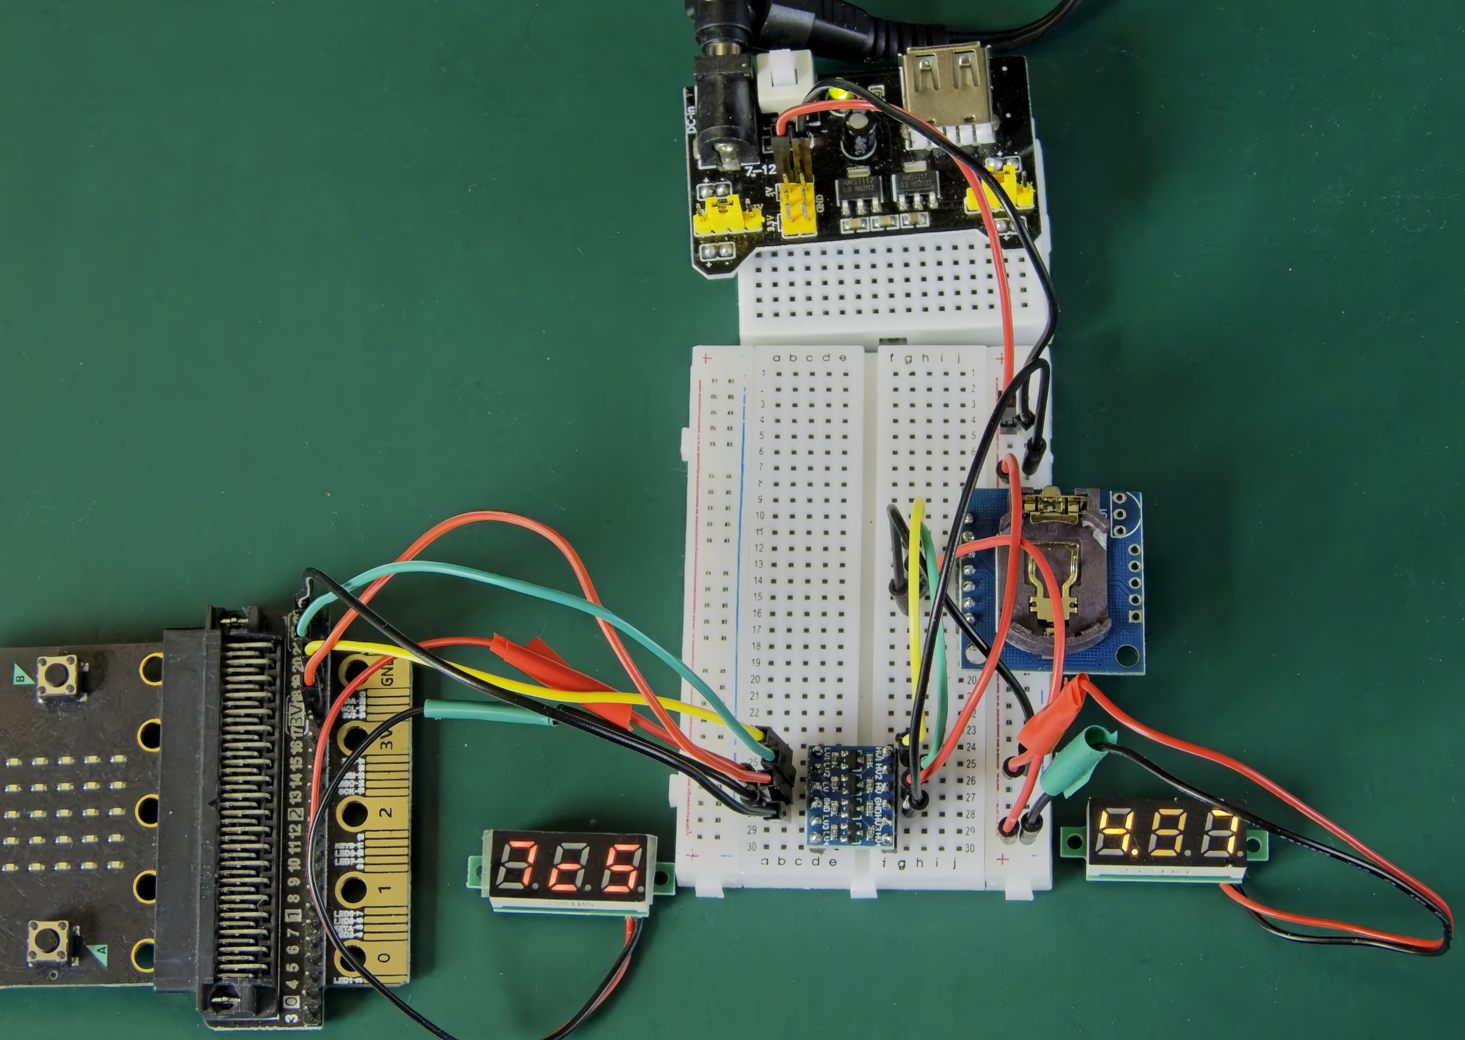
Hookup Guide
- Powering the DS1307
- Connect VCC to +5V
- Connect GND to 5V supply GND
- Connecting 5V side of the Logic Level Shifter
- Connect HV pin to +5V
- Connect GND pin to 5V supply GND
- Connect HV1 pin to DS1307 SCL pin
- Connect HV2 pin to DS1307 SDA pin
- Connecting 3.3V side of the Logic Level Shifter
- Connect LV pin to micro:bit 3.3V pin
- Connect GND pin to micro:bit GND pin
- Connect LV1 pin to micro:bit Pin 19
- Connect LV2 pin to micro:bit Pin 20

Note: The hookup shown above has 2-wire digital voltmeters on the 3.3V and 5V power rails. This is entirely optional and is there simply for peace of mind.
Though not entirely clear in the photo, the right-hand side voltmeter is reading 4.97V. The left-hand side voltmeter was caught by a fast shutter speed while it was undergoing a 7-segment refresh! The meter, in fact, was reading a steady 3.25V.
Driver Overview
The driver is implemented as a class. The first thing to do is declare an instance of the class.
from fc_ds1307 import *
my_clock = DS1307()
The I2C slave address of the DS1307 is 0x68 and is fixed at the point of manufacture. There are no options on the chip to change this address. It is defined as a constant (I2C_ADDR) at the top of the driver code file.
This assumes that the file fc_ds1307.py has been successfully copied to the micro:bit's filesystem as described above.
The driver provides methods that:
- Set and read the time (seconds, minutes, hour)
- Set and read the date (weekday, calendar day, month, year)
- Read and write to the user RAM
While the DS1307 RTC supports both 12hr clock time and 24hr clock time this driver only supports 24hr time.
Following is a full list of methods that are user callable. Each method is described and example use given in the sections below.
| Sec() | Mins() | Hr() | Wday() |
| Day() | Mon() | Yr() | DateTime() |
| Time() | Date() | Ram() |
Set and Read the Time
The hour (in 24Hr format), minutes and seconds can be set (and read) with the following methods:
- Sec(sec = None) ; valid values 0 to 59
- Mins(mins = None) ; valid values 0 to 59
- Hr(hr = None) ; valid values 0 to 23
If the method is called with no argument the requested time component (hours, minutes or seconds) is read and returned.
from fc_ds1307 import *
my_clock = DS1307()

# Set hours
my_clock.Hr(10)

# Read hours
print('Hour is:', my_clock.Hr())

⇒ Hour is: 10
The following method sets (and reads) hours, minutes and seconds in a single call:
- Time(h=None, m=None, s=None)
This method is very flexible. Any combination of hours, minutes and seconds can be set on the DS1307.
If the method is called with an empty argument list then the time is returned as a string in the format "HH:MM:SS". This string format is understood by spreadsheet programs such as Microsoft Excel and is useful for exporting logged data for further analysis.
from fc_ds1307 import *
my_clock = DS1307()

# Set hours, minutes and seconds
my_clock.Time(h=11, m=9, s=0)
# Read time and return formatted string
print('Time is:', my_clock.Time())

# Set minutes only
my_clock.Time(m=31)
# Read time and return formatted string
print('New time is:', my_clock.Time())

Time is: 11:09:00
New time is: 11:31:00
Set and Read the Date
The year, month, day and weekday can be set (and read) with the following methods:
- Yr(yr = None) ; valid values 0 to 99
- Mon(mon = None) ; valid values 1 to 12
- Day(day = None) ; valid values 1 to 31
- Wday(wday = None) ; valid values 1 to 7
If the method is called with no argument the requested date component (year, month, day or weekday) is read and returned.
from fc_ds1307 import *
my_clock = DS1307()

# Set month
my_clock.Mon(9)

# Read month
print('Month is:', my_clock.Mon())

⇒ Month is: 9
The following method sets (and reads) year, month and day in a single call:
- Date(y=None, m=None, d=None, fmt=1)
This method is very flexible. Any combination of year, month and day can be set on the DS1307.
If the method is called without providing year, month and day then the date is returned as a string in the format defined by the argument fmt.
- fmt = 1 ; "YYYY-MM-DD"
- fmt = 2 ; "DD-MM-YYYY"
- fmt = 3 ; "MM-DD-YYYY"
These string formats are understood by spreadsheet programs such as Microsoft Excel and is useful for exporting logged data for further analysis.
from fc_ds1307 import *
my_clock = DS1307()

# Set year, month and day
my_clock.Date(y=24, m=9, d=23)
# Read date and return formatted string
print('Date is:', my_clock.Date(fmt=1))

# Set day only
my_clock.Date(d=20)
# Read date and return formatted string
print('New date is:', my_clock.Date(fmt=2))

Date is: 2024-09-23
New date is: 20-09-2024
The Universal DateTime() Method
The DateTime() method allows all seven date and time parameters to be set (and read) in a single call.
Syntax:
DateTime(dat = None)

Where:
dat : A list containing (in the order given):
        [Year,
        Month,
        Day,
        Weekday,
        Hour,
        Minutes,
        Seconds]

Example:
from fc_ds1307 import *
my_clock = DS1307()

# Set date/time 2024-09-23 15:26:00
dt = [24, 9, 23, 1, 15, 30, 0]
my_clock.DateTime(dt)

print(my_clock.DateTime())

⇒ [2024, 9, 23, 1, 15, 30, 0]
Read and Write the User RAM
The DS1307 chip provides 56 bytes of non-volatile RAM for general purpose use. The user might take advantage of this, for example, to store startup parameters. Being non-volatile, the RAM contents are retained after power is lost to the DS1307.
The driver provides the method Ram() to read and write to the RAM. This is a very simple method with no error checking performed.
It reads or writes a single byte on each call. The 8-bit byte value is expected to be an integer in the range 0 to 255.
Syntax:
Ram(reg, dat=None)

Parameters:
  reg : The RAM register to be read or written to.
        It is a value in the range 1 to 56.

  dat : The value that is written to the
        given RAM register. It must be an
        integer in the range 0 to 255.

Note:
If dat is not provided then the method will read
and return the value in the RAM register reg.

Example 1
from fc_ds1307 import *
my_clock = DS1307()

# Write the value 0x20 to RAM register 5
my_clock.Ram(5, 0x20)

# Read value at RAM register 5
print(hex(my_clock.Ram(5)))

⇒ 0x20

Example 2
# Test reading & writing to the RAM
from fc_ds1307 import *
ds1307 = DS1307()

# Write value 2 to all RAM registers
for reg in range(1, 57):
    ds1307.Ram(reg, 2)

# Read back all RAM values.
# Sum the values.
sum = 0
for reg in range(1, 57):
    sum += ds1307.Ram(reg)
print('Sum =', sum)

⇒ Sum = 112
Example 2 writes a value of 2 to each of the 56 RAM registers. It then reads back the value of each RAM register, summing the values. Since there are 56 registers each containing a value of 2, the sum will be 56 x 2 = 112.
Enjoy!
DS1307 Driver Code for micro:bit
Download as zip file
'''
 DS1307 Real Time Clock Driver
 for the BBC micro:bit

 Original author: shaoziyang
 Date: 2018.2
 http://www.micropython.org.cn

 Extended by fredscave.com
 DATE: 2024.12
 VERSION: 1.00
'''

from microbit import i2c
from micropython import const

I2C_ADDR  = const(0x68)
REG_SEC   = const(0x00)
REG_MIN   = const(0x01)
REG_HR    = const(0x02)
REG_WDAY  = const(0x03)
REG_DAY   = const(0x04)
REG_MON   = const(0x05)
REG_YR    = const(0x06)
REG_RAM   = const(0x08)

class DS1307():

    def DecToHex(self, dat):
        return (dat//10) * 16 + (dat%10)

    def HexToDec(self, dat):
        return (dat//16) * 10 + (dat%16)

    def setReg(self, reg, dat):
        i2c.write(I2C_ADDR, bytearray([reg, dat]))

    def getReg(self, reg):
        i2c.write(I2C_ADDR, bytearray([reg]))
        return i2c.read(I2C_ADDR, 1)[0]

    def Sec(self, sec = None):
        if sec == None:
            return self.HexToDec(self.getReg(REG_SEC))
        else:
            self.setReg(REG_SEC, self.DecToHex(sec%60))

    def Mins(self, mins = None):
        if mins == None:
            return self.HexToDec(self.getReg(REG_MIN))
        else:
            self.setReg(REG_MIN, self.DecToHex(mins%60))

    def Hr(self, hr = None):
        if hr == None:
            return self.HexToDec(self.getReg(REG_HR))
        else:
            self.setReg(REG_HR, self.DecToHex(hr%24))

    def Wday(self, wday = None):
        if wday == None:
            return self.HexToDec(self.getReg(REG_WDAY))
        else:
            self.setReg(REG_WDAY, self.DecToHex(wday%8))

    def Day(self, day = None):
        if day == None:
            return self.HexToDec(self.getReg(REG_DAY))
        else:
            self.setReg(REG_DAY, self.DecToHex(day%32))

    def Mon(self, mon = None):
        if mon == None:
            return self.HexToDec(self.getReg(REG_MON))
        else:
            self.setReg(REG_MON, self.DecToHex(mon%13))

    def Yr(self, yr = None):
        if yr == None:
            return self.HexToDec(self.getReg(REG_YR)) + 2000
        else:
            self.setReg(REG_YR, self.DecToHex(yr%100))

    def DateTime(self, dat = None):
        if dat == None:
            return [self.Yr(), self.Mon(),
                    self.Day(),self.Wday(),
                    self.Hr(), self.Mins(), self.Sec()]
        else:
            self.Yr(dat[0])
            self.Mon(dat[1])
            self.Day(dat[2])
            self.Wday(dat[3])
            self.Hr(dat[4])
            self.Mins(dat[5])
            self.Sec(dat[6])

    def Time(self, h=None, m=None, s=None):
        if (h==None) and (m==None) and (s==None):
            str_sec = "%02d" % self.Sec()
            str_min = "%02d" % self.Mins()
            str_hr = "%02d" % self.Hr()
            return str_hr + ':' + str_min + ':' + str_sec
        if (s != None):
            self.Sec(s)
        if (m != None):
            self.Mins(m)
        if (h != None):
            self.Hr(h)

    def Date(self, y=None, m=None, d=None, fmt=1):
        # fmt = 1; YMD
        # fmt = 2; DMY
        # fmt = 3; MDY
        if (y==None) and (m==None) and (d==None):
            str_day = "%02d" % self.Day()
            str_mon = "%02d" % self.Mon()
            str_yr = "%04d" % self.Yr()
            if fmt == 1:
                return str_yr + '-' + str_mon + '-' + str_day
            if fmt == 2:
                return str_day + '-' + str_mon + '-' + str_yr
            if fmt == 3:
                return str_mon + '-' + str_day + '-' + str_yr
            return None
        if (d != None):
            self.Day(d)
        if (m != None):
            self.Mon(m)
        if (y != None):
            self.Yr(y)

    def Ram(self, reg, data = None):
        if data == None:
            return self.getReg(REG_RAM + ((reg-1)%56))
        else:
            self.setReg(REG_RAM + ((reg-1)%56), data)