micro:bit UART Program Example
Contents
Aim
This page provides an example project with the micro:bit's UART sending messages to a serial console running on a computer.
A Serial to USB Adapter is used to connect a GPIO pin configured as UART transmit (tx) to a USB port on the computer.
The micro:bit will be flashed with a MicroPython program using the Mu Editor. Any convenient MicroPython editor e.g. uPyCraft or Thonny could also be used.
A Windows computer running the popular PuTTY serial monitor program will receive the serial packets from the micro:bit and display the message on the console. Again, any convenient and equivalent program could be used on a Mac or Linux machine.
Components List
Hardware
- 1 x BBC micro:bit V2
- 2 x Dupont F-F wires
- 1 x Serial to USB Adapter with 3.3V jumper
- 1 x USB cable for adapter connection to computer's USB port
Serial to USB Adapters, also often referred to as USB to TTL converters, are readily available. They can be picked up from Chinese stores for less than US$1. These Chinese versions often use the CH340G interface chip. The earlier versions of this chip could be problematic but the latest seem to work just fine.
The more serious or industrial user may decide to pay slightly more for a more versatile chip such as FTDI's FT232RL offering.
When purchasing these for the micro:bit there is one very important consideration. The USB port on the computer operates at 5V but the micro:bit is powered with 3.3V. Applying 5V to a GPIO pin on the micro:bit runs the serious risk of rendering that pin useless.
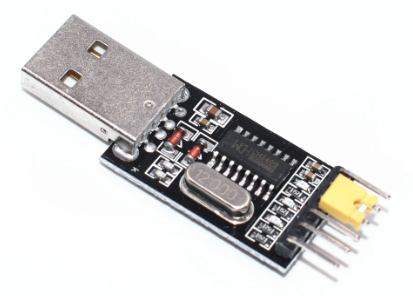
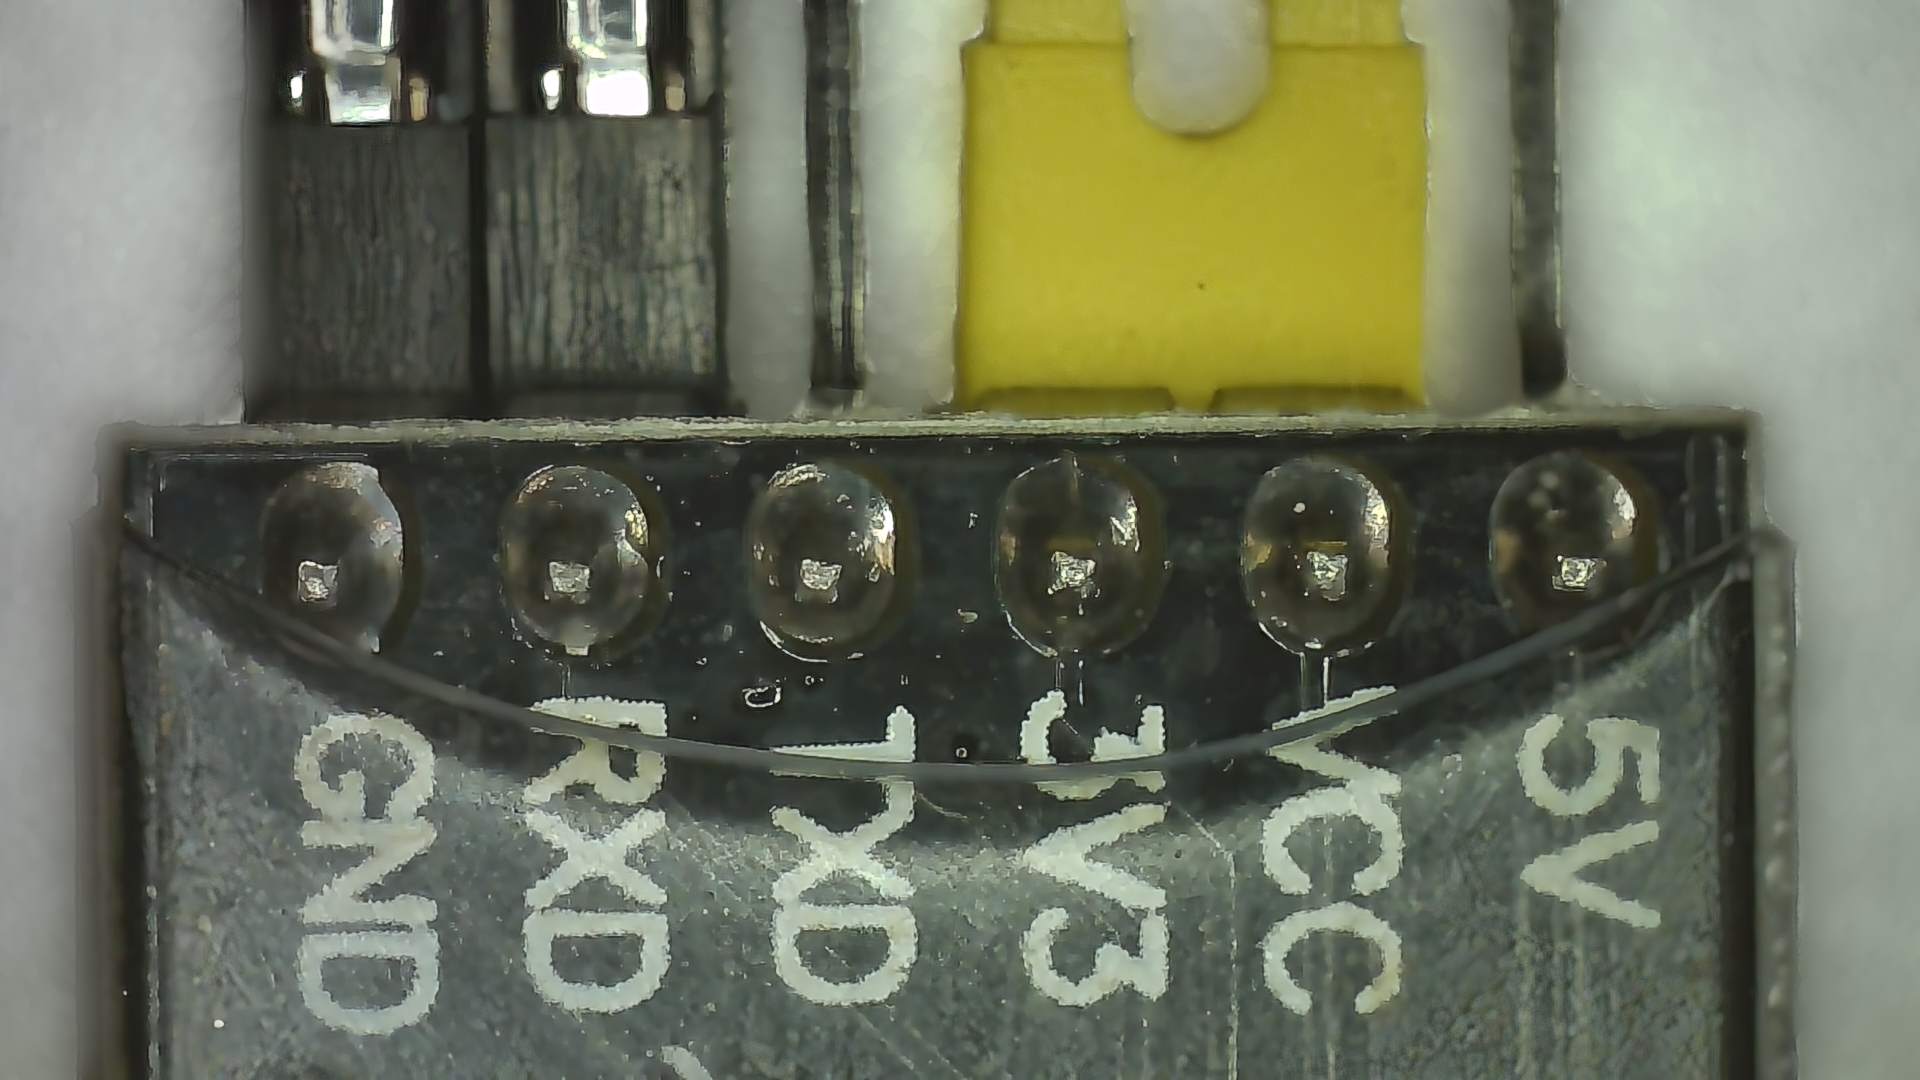
The adapter shown in FIG 1 comes with the option of selecting 5V or 3.3V at the pins. The yellow jumper is used to make the voltage selection. FIG 2 below shows the 3.3V jumper selection that must be used when connecting the adapter pins to the GPIO pins of the micro:bit.
When purchasing one of these adapters for micro:bit use it is necessary to ensure that the board purchased offers this voltage jumper option - as not all do come with the option.
Software
- Mu Editor - or alternative MicroPython editor for the micro:bit
- PuTTY - or any other serial monitor program that runs on the computer used for the project
The PuTTY program is described as an SSH and telnet client. It was originally developed for the Windows platform but is now (sort of) available for Mac and Linux. It is open source and is actively supported by a group of volunteers.
It is a popular choice for its functionality; being easy to install, update and use. The installation files are available at the putty.org website.
Wiring the Circuit
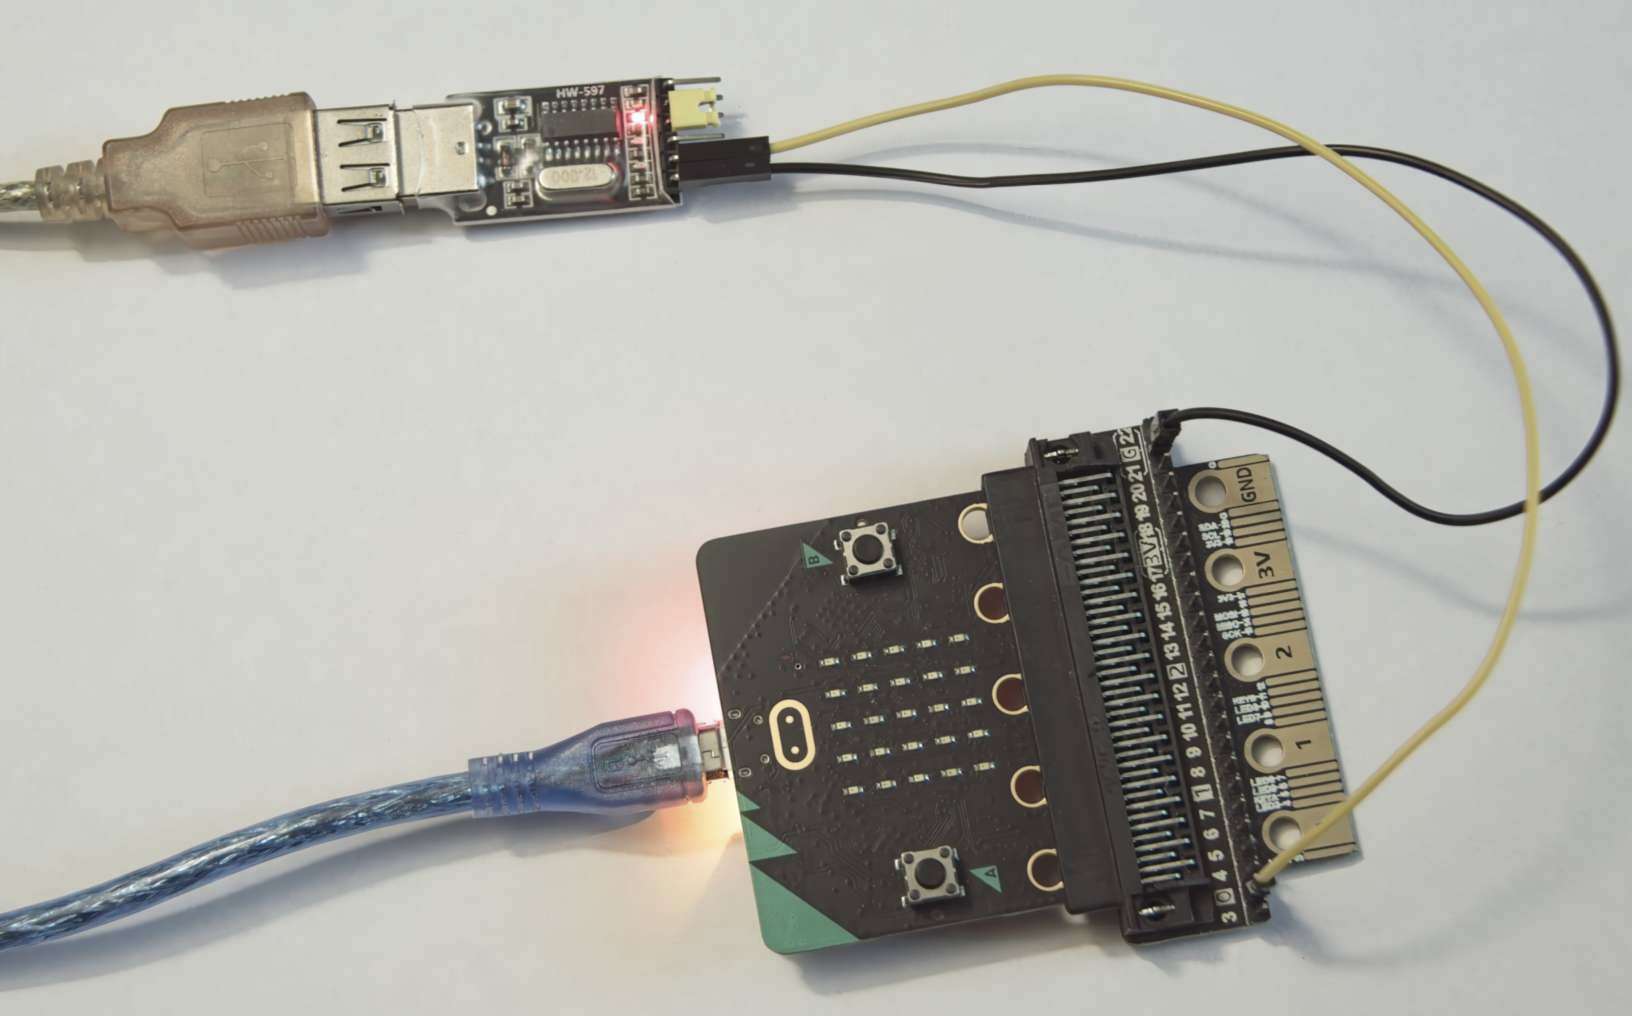
Complete the wiring of the project before powering up the micro:bit or plugging the Serial to USB Adapter into the computer's USB port.
Make the following connections:
- important: Set the voltage jumper to 3.3V.
- Connect micro:bit GND pin to Adapter GND pin
- Connect micro:bit Pin 0 to Adapter Rx (or RXD) pin
- Power up the micro:bit from a USB port on the computer and open the Mu Editor.
- Plug the USB end of the Serial to USB Adapter into another USB port on the computer.
Configuring the Serial Console
This assumes that the serial console program PuTTY will be used. Any convenient alternative can be used. The setup will be similar.
Step 1: Find which serial port the serial-to-USB adapter is using on the computer.
The following instructions show how this is done on a Windows machine.
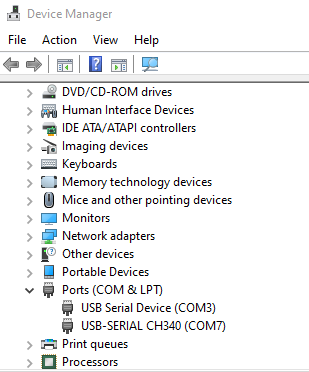
Open Device Manager and examine the Ports (COM & LPT) section. In this case the adapter is on COM7 as shown in FIG 4.
Step 2: Set serial mode, serial port and baud rate.
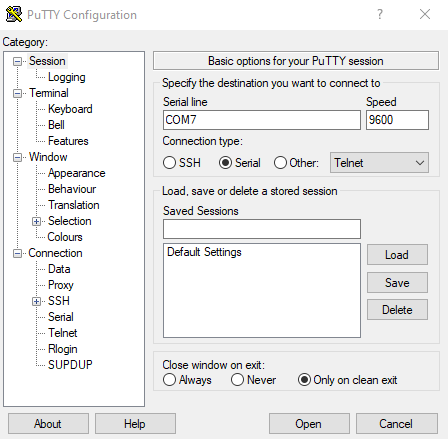
Open PuTTY and do the following:
- Under Connection type select Serial
- Under Serial line type in the serial port that the serial-to-USB adapter is using; COM7 in this case.
- Under Speed enter the baud rate as 9600.
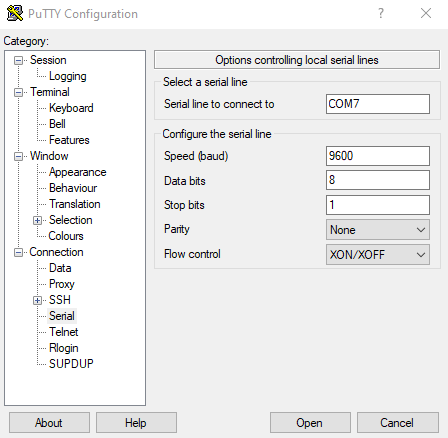
Step 3: Set remaining serial parameters: data bits, stop bits, parity.
Under Category in PuTTY, select Serial in the Connection section of the tree and check that the following are configured correctly:
- Data bits = 8
- Stop bits = 1
- Parity = None
Step 4: Open the serial console
Click the Open button to launch the serial console.
MicroPython Program
Copy the following program to the Mu Editor and flash it to the micro:bit.
Clicking the REPL button will reveal a blank pane. The REPL has been 'disconnected' with the micro:bit's UART output now directed to the PuTTY serial console.
# This example sends output text with the
# micro:bit's UART to a terminal program
# running on a computer.

from microbit import *

# Initialise the UART
# The Rx pin isn't used but must still be provided.
uart.init(baudrate=9600, tx=pin0, rx=pin1)

# Loop until Button B is pressed.
finished = False
while not finished:
    if button_a.was_pressed():
        uart.write('Button A was pressed\r\n')
    finished = button_b.was_pressed()

uart.write('Program shutting down...\r\n')

# Restore the REPL
uart.init(baudrate=115200)
Program usage:
- Press Button A on the micro:bit several times and observe the output in the PuTTY serial console window.
- Press Button B on the micro:bit to stop the program and restore the REPL.

Note the use of the escape characters \r\n at the end of each string written out by the UART. The was found to be necessary to correctly format lines of text in the PuTTY serial monitor.
The \r is a carriage return and moves the cursor to the beginning of the line. The \n moves the cursor to a new line.